I could have posted a few times during the last few months to document the progress I have made on Allietare, but I didn't. Oh, well.
Here is what Allietare looked like on January 28:
 |
| The borders are on! |
More recently, I found a block of time I could use for the next couple of steps. Last time I reached this stage I had a bad experience with spray baste. I researched this step further and decided to go with pin basting. I used Warm & Natural Needled Cotton batting. So far, I have been very pleased with the batting, though I haven't washed it yet. I used refrigerator magnet clips to clip the quilt sandwich to a utility table. Then I pinned the sandwich.
My next step was stabilizing the quilt sandwich by stitching in the ditch. It has been a while since I have done that. I started out going crazy fast and had practically no control. I kept having to slow down. I finally remembered that I have a speed control on my machine.
I used my walking foot and and it did a good job. I did not have any bunching this time. I only ran into a safety pin once. 😅
I finished that part today:
I'm having a hard time to deciding how to quilt it. I will be doing some type of free-motion style quilting. I will be using gold/yellow thread. That's all I know. It almost looks like I could get away without further quilting, but I want to at least quilt the large squares and the large white pieces along the edges. And there is no way to avoid quilting the black border.
I finished the En Provence top on June 15. It's going to sit on the back burner now until Allietare is all done.
Lessons learned:
- Save the spray baste for small projects.
- Don't skimp when pinning.
- SLOW DOWN when stitching in the ditch.
- Use the speed control, too.
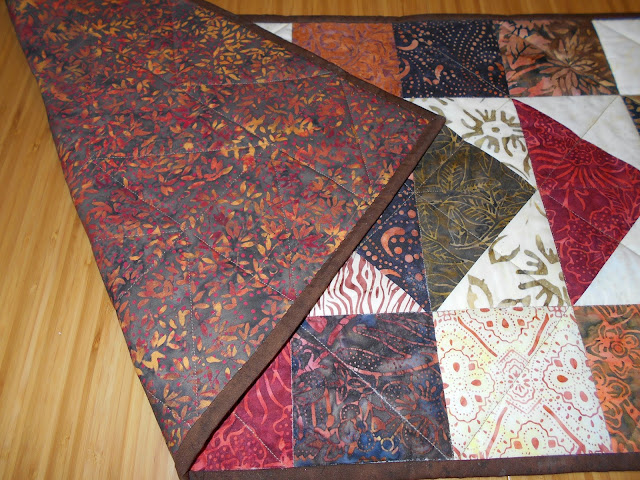
I made a table runner using a Timeless Treasures Tonga Treats kit that I bought for practically nothing on sale from Craftsy. I love batiks! This color run is called Spice. The pattern for the table runner was included in the package.
Here is the backing. The backing, binding, and batting were not included in the kit.
I used Insul-Bright for the batting. It is an insulated backing designed for projects like this. Theoretically you could put a hot dish on it and your table would be okay. I'm not going to do any experiments to see if that is true. It's nice to know that I have a little extra protection, though. Insul-Bright is washable, too. What a great idea.
I sewed the binding down by hand. That wasn't too bad for this size project. I don't know if I would want to do it for a bed-size quilt. However, I do prefer the way it looks
I stitched in the ditch around the squares and then I stitched diagonally across the squares in an alternating chevron pattern. The squares that consist of two different prints do not have stitching along the seam where the two prints join - i.e., all of the squares have only one diagonal quilting line.
Although the overall project is somewhat busy, I don't like the two fabrics with such light prints that they appear to be practically solid cream. One has very light dots. The other is, I think, called Java Blender. I wish I had tried to substitute. If I were doing it again, I would substitute with a low-contrast print in a light rust and/or light brown.
What did I learn from this project?
1. Small projects are really easy.
2. Geometrical quilting lines are really easy.
3. You don't have to use what's in the kit.
4. It IS possible to completely finish a quilting project!


