Showing posts with label mystery. Show all posts

Saturday, February 27, 2021

Wading In - Chester Creek, Week 2

December 4, 2020
 
This was a busy week in Quiltville North. Bonnie Hunter released Part Two of Grassy Creek. This Grassy Creek is Bonnie Hunter's annual quilt-along mystery. The task this week was to make hourglass units. 
Bonnie offered two methods to make the units. I chose the method that employs Bonnie's Essential Triangle Tool because it is fun and easy to work with.
 
Essential Triangle Tool

 I was experiencing a little slippage while I was using the tool, so I added some sandpaper dots, and that made a big difference.

The sandy side of a sandpaper dot


I made a number of quarter square triangles and then sewed them together to make hourglass units. Bonnie provided very helpful tips for cutting, pressing, and sewing. The center points turned out perfectly! 

I especially liked her suggestion for "spinning" the seam in the center to reduce bulk. Everything went together very nicely. 

Ta da!


Friday, November 27, 2020

Getting My Feet Wet, Thinking Local - Chester Creek, Week 1

There's a special feeling that comes with starting a new project. You have a clean slate and high expectations. I don't know what this quilt will look like - hence, the mystery - but I know it will be beautiful and I know the directions will be clear and precise and helpful.

My new project is Bonnie Hunter's 2020 Mystery Quilt-along. She has called it Grassy Creek, as she was inspired by a  creek of that name near her home in southern Virginia. Mine quilt is going to be called Chester Creek, for the creek nearest to me.

Screw you, Covid-19. I'm going to have fun staying at home and sewing. I have managed to get the fabric I need via mail-order (thank you Missouri Star), and I have put a new blade in my rotary cutter and would several bobbins. I even have new clips to keep the threads on my bobbins from unwinding. I have tried several different things to solve this problem and nothing has been satisfactory. I think these are going to work. 😊

The problem

The solution

What will Bonnie Hunter tell us to make first? Half-square triangles, using the golds and the greys! She offered several cutting methods. I chose to use the method which employs her Essential Triangle Tool. It seems to be the easiest.

Essential Triangle Tool

I really like the Essential Triangle Tool, but I did notice that it tended to slip when cutting a stack of four strips. I decided to add some sandpaper dots, and that seemed to lessen the GC 1-5slippage.

Sandpaper dot closeup
 

Another problem I encountered was the difficulty of cutting relatively narrow strips from the ends of the various one-yard cuts of fabric I was working with. In the past, I have generally worked with 1/4-yard cuts and I did not have to worry about cutting such lengthy strips. But this year, I had to order from Missouri Star and they have a 1-yard minimum for yardage. If I did another quilt like this, I would probably cut the pieces into 1/4-yard cuts before starting.

My third challenge was getting the finished size right. Bonnie Hunter said the seams should be "scant," but I usually ended up with finished squares that were too large, so I just sewed my regular 1/4" seams - which was easier to do - and my pieces ended up correctly sized.

Despite these minor issues, I finished Part 1 easily, and the pieces ended up looking very nice.

Part 1 pieces

Ta da! (Clue) One and done!


Thursday, November 26, 2020

Chester Creek


Bonnie Hunter has released the colors for her 2020 Mystery Quilt-Along. Link to Bonnie Hunter's Mystery here: Grassy Creek - A Quiltville Mystery (Introduction!)

Bonnie's colors were inspired by the countryside surrounding her home in the Blue Ridge Mountains. For the first time, I am going to deviate from Bonnie's colors. I am going to take my inspiration from the creek and forest near my home in Alaska. 

 We don't have a lot of reds and oranges in the woods here, so I am going to replace Bonnie's red with a plummy purple, and I will replace her orange with a dark, bluish green. I will stick with the other colors Bonnie chose: gold, yellow-green, white, and gray.

I will not be going into shops at this time. I ordered all of my fabric from Missouri Star Quilt Company. They got it here very quickly. I had to buy pieces which were a minimum of one yard, so that meant fewer different fabrics. The result will be less scrappy, but it will still be scrappy enough, I think.

It is a little hard to get the colors right when you order on line. I had to let go of my usual obsession with finding the exact shade. I am forced to accept a wider range of tones within each color group. I think this will be good for me.

Golds 


Yellow Greens


Dark Greens


Plums


Grays

 
Whites 


This time around I decided to take the time to pre-wash my fabric. Even though it is all high quality fabric, I have concerns about colors running and fabric shrinking. I washed the fabric in warm water and dried it in a medium dryer. 
 
You wouldn't believe the amount of unraveling that happened. I started out sewing a basting stitch about  1/4 inch from the edge. It didn't seem to prevent unraveling. I ended up sewing a zig-zag stitch as close to the edge as possible. It still unraveled a lot.
 
And it shrank. I didn't measure it scientifically, before and after, but each one yard piece seems to have shrunk about two inches. Some of that may resolve itself when I iron the fabric. This makes me worry about some of my previous projects. Most of those are unfinished, and most were not pre-washed. How will the fabric behave once it has been cut into small pieces and sewn to other small pieces? Should I worry? 
 
Well, I am really excited to begin this mystery quilt. Tomorrow is the day the first clue will be revealed!


Sunday, February 2, 2020

Endplay

Part 9

Whoa, Nellie! This is a part to end all parts. A clue of great consequence and substance. It is ten pages long. It is very complicated. There are lots of steps. 

But, this clue contains The Reveal. It is the Final Clue. Bonnie Hunter's brilliance and talent is also revealed. As if we didn't already know how good she is.

The first thing I had to do was cut out a lot of neutral squares. Then I had to cut out some neutral rectangles. Then some blue squares.  

The second thing I had to do was make four blocks (large four-patches, really) using the four-patches from Part 1 and the neutral squares from Part 9 and the HSTs from Part 4 which are now part of the mega-sets from Part 8.

The second step

The third thing I had to do was take the Flying Geese from Part 6 and the Flying Geese from Part 8 and sew them together. Bonnie Hunter cleverly designed this so that the seams would nest when you sew the Flying Geese together. I almost missed it, because I didn't read all of the directions when I made Part 6. I just assumed I knew how to press the seams. Fortunately, it was an easy fix. I just had to press the final seam on each piece in the opposite direction.

The third step

The fourth step involves sewing the four-patches, the Flying Geese, and the pinwheels together into a large nine-patch block. Wow! It looks great. It is amazing how it turned out with all of the aquas, blues, and raspberries matching up so easily. I was so pleased with how nicely all the points turned out and how flat the final block is. There are a few bulky seams, but Bonnie figured out how to keep the bulk to an absolute minimum. I love this star block.

The fourth step

There are several more steps in this final clue. I am not ready to go beyond the fourth step yet. I have to make all of the pieces for Parts 1 through 8 and  have to make quite a few more of these star blocks.

This is the end of the clues, but not even close to the end of my work. There will be more blog posts, but I suspect there will be longer gaps between them. I have had a lot of fun playing with fabric so far.

Friday, January 31, 2020

Playmates

Part 8
This clue has good news and bad news.

The bad news is: More Flying Geese. They will be raspberry, blue, and aqua (RBA, for short).

The good news is: No cutting! We are going to use pieces - but not all of them - from Part 4 (aqua QSTs) and Part 7 (raspberry and blue HSTs) to make RBA Flying Geese.

After sewing the RBA Flying Geese, I combined sets from earlier Parts to make two kinds of mega-sets. 
  • Type A has the green Flying Geese from Part 6, and the RBA Flying Geese I just made in Part 8, and the Pinwheels from Part 7, and the HSTs from Part 4. 
  • Type B consists of the green Flying Geese from Part 6, and unsewn RBA pieces from Part 4 and Part 7 that match the pieces I used to make RBA Flying Geese, and HSTs from Part 7 (i.e., the unsewn Pinwheel HSTs) and HSTs from Part 4.

It sounds very complicated. It was so complicated I forgot to take photos. But, it really wasn't as hard as it could have been, because the raspberry, blue, and aqua pieces within each mega-set matched! 

All of these pieces played so nicely together! And it's not too late to take photos now. Here are two of my Type A sets:


Monday, January 27, 2020

Play It Again, Ma'am

Part 7

For Part 7 I had to cut a lot of blue and raspberry Half Square Triangles. Then I had to sew half ot them together into squares, just like I did for Part 3 and Part 4 and Part 5. 

Oooohkaaaay. I can do that. But first I have to go to the fabric store and buy more raspberry fabric. I didn't get enough initially. And I didn't get enough different raspberry fabrics. I think this quilt will look better with more variety. That's one reason I don't make all of the pieces in a part (or clue) the first time through. If I end up getting more fabric later, I want to be able to distribute it evenly throughout the different parts. If I just plowed ahead and sewed all of the parts in each clue, I might run out of raspberry in Part 5 and the find out the shop where I bought it is now out, and I would get something different and then clue 7 would have only the new raspberry, and clues 1, 2, and 5 would not have any of the new raspberry, and it might not look good. It's possible it would still look good, but I don't want to take any chances.

The reasons I don't buy all the fabric in the first place so I can avoid running out are:

1) I am always hoping I will find another fabric that I love before I am too far along
2) The instructions don't usually specify how much is needed for each color

I might run out anyway because I made a mistake and wasted some fabric, or because the instructions were wrong, or  . . . . It happens.

These are some of the things that makes a mystery quilt interesting.

So, I was talking about making squares. After I made lots of squares, I had to take some of the squares and make them into pinwheels. 😾 I really don't like pinwheels. They are so hard. I can never get the points to meet in the center. There is always so much bulk in the center. Ugh.

I followed Bonnie Hunter's directions very carefully. I measured whenever she said to. Bonnie says to keep the line on the ruler up on the fabric, and I did. Bonnie says to allow for the fold in your measurement, and I did. Bonnie says to trim slivers using the Simple Folded Corners Ruler after you sew the squares, and I did.

And you know what? It worked. I am VERY pleased with how nicely my pinwheels turned out. They are flat, and the correct size, and the points meet in the center. Whooppeee! These are my best pinwheels ever.

Sunday, January 19, 2020

Double Play

Part 5
All I had to do was some half-square triangles. They are almost the same as the HSTs from Part 3. Easy peasy!

Part 6
Flying Geese. 😩 They are so much work. I always end up having to redo a lot of them. It's hard to keep the three parts aligned in a straight line.

The green fabric is finally making its debut now. It is going to be a "constant" fabric, so there is only one green fabric. I was beginning to wonder when we would use it. The green fabric will be cut into HSTs and combined with the blue QSTs from Part 4.

The blue QSTs are already in sets.That makes it easy to make the Flying Geese in sets.  Each finished set of Flying Geese has to be placed back into the group of pieces those blue QSTs came from. 

Once again, I made good use of the Essential Triangle Tool to cut my wing triangles from green strips. 
 
I had fewer redos[1] than I have had in the past. Maybe I am finally getting the hang of this.


[1] The Blogger editor doesn’t like redos. I looked it up and the internet thinks redos is the proper plural of redo, although redo's is also acceptable. Note, however, that when redo is a verb, redoes may be appropriate in the case of third-person usage. Note, also, that redo should not have a hyphen.


Even though I didn't have many redos, these pieces took forever. To make things worse, Bonnie slipped Part 6 in as a second part in a single week, so I also had half the expected amount of time to complete this part. I now understand that I am not going to catch up to the live mystery. Oh, well.

Wednesday, January 15, 2020

Play by Play

Part 3

Part 3 of the Frolic! quilt calls for half-square triangles with a neutral fabric for one half and either dark blue or light blue for the other half. I used Bonnie Hunter's Essential Triangle Tool to cut the pieces from short (for greater variety) fabric strips. There are other methods for cutting half-square triangles, but I really like this method because it seems to minimize waste. It's also fast, because you can cut both halves of the square at the same time.
Some of my half-square triangles

Part 4

In Part 4 I finally got to use some of my aqua fabric. I found a really fun print that I am going to use as an aqua. I almost could have used it as a neutral. It has accents of raspberry, dark blue, and sage green (coming up eventually), and the pictures are soooo charming. (OK, so I realize they won't be that charming after I cut the fabric into a lot of little triangles, but I will know what was there.)

Part 4 was very complicated. I had to make a number of sets of blue and aqua. Each set has 4 half-square triangles, which I had to cut out and sew, and 4 blue quarter square triangles plus 4 aqua quarter square triangles, which I did not have to sew (yet). Each set can (and, for a scrappy look, should) be different, but the blue and aqua fabrics within a set have to be the same for all the pieces in the set.

I can't show you a picture of a complete set because I used certain elements of each set in a later part. Here are some of my completed HSTs. Each one is from a different set.


There is a way to cut out both the HSTs and QSTs from a single strip (if you are careful!) using the Essential Triangle Tool. I had to make some adjustments, but I was able to do it.
The Essential Triangle Tool

One aspect that was especially tricky was getting sufficient contrast between the aqua and the light blue. I like contrast a lot, and I wanted to have as much contrast as possible, so I tried to avoid certain combinations of aqua and light blue. I am probably going to end up with about 70 to 75% of my sets being made with dark blue, but I think I will like that. Here is a pairing that I made where I didn't love the contrast.

Here is a trick for studying contrast. Change your photo to black and white and see what the contrast looks like.


It's actually not as bad as I thought. 

But look at the contrast between aqua and dark blue. It is much stronger for the five dark blue HSTs than for the light blue one in the upper left corner.


I am going to trust Bonnie Hunter and keep some light blue in the quilt. What do you think?

Saturday, January 11, 2020

Playing Catch Up

I thought if I worked hard, I could get caught up to the group quilting-along with Bonnie Hunter on the Frolic! mystery quilt. I decided to try to finish between 25% and 50% of the pieces in each clue.


The clue for Part 1 called for making four-patches using raspberry, light blue, and dark blue. Here are a few of mine. The lighting was bad and the colors do not appear accurate in the photo. But you get the idea.


I followed Bonnie Hunter's "nesting method" to make these four-patches. It speeds things up, but what I really liked about it was how nicely the center seams aligned.

Part 2 was pretty easy. I made these pieces with raspberry and neutral. I have quite a lot of different neutrals. I even tried using a neutral that was a plain solid.
Part 2 pieces

The colors are much more accurate here. 

I started out over 5 weeks behind. I don't seem to be catching up. :(


Tuesday, January 7, 2020

Merry Play

Wow, it's been a while since I posted about quilting. I've been traveling more and sewing less. Now I have a little time to sew and I have a new project I am working on. I know. You are wanting to see a picture of the finished Good Fortune quilt, or the surprise piece I am making for my friend. Well, unfortunately, I haven't made much progress on those projects.

Meanwhile, while we were away on our last trip, Bonnie Hunter started a new Mystery Quilt-Along. This one is called Frolic!. As soon as we got home I tried to dive into it. It took me a while to get the fabric. We are down to three local quilt shops plus Jo-Ann's. One of them is downtown and caters mainly to tourists with primarily Alaskan-themed fabric that I don't often use. The second shop, Seams Like Home, has a buyer whose tastes are the polar opposite of mine. Lately I haven't been able to find much there. That leaves one good quilt shop, The Quilt Tree, plus Jo-Ann's. (I recently heard a rumor that Jo-Ann's is going to move into a smaller location and the two local outlets are going to consolidate. Can this be?)

Now that I think about it, there are actually two quilt shops in Eagle River. I have never been to them and I don't like driving out there in the winter, but I must remember to check them out soon.

So, I wanted to start Bonnie Hunter's new mystery quilt-along because I love the colors she used. After about 5 trips to three of the four local fabric stores, I had enough fabric to start. Here is a good part of it:
My Dark Blues
My Raspberries

My Light Blues

In case you're wondering, one of the definitions of frolic is "merry play." What a perfect description of how I feel when I'm quilting!

Tuesday, April 23, 2019

Friends with Sewing Machines

What better way to spend a snowy holiday Sunday than sewing with friends? I have a new project and I needed a little push to get started so it was the perfect time for a Sewing Day.

I am making a wall hanging as a gift for some friends. It's sort of a surprise so I'm not going to say too much about it yet. It is based on a printed panel I bought. The panel came without any pattern or suggestion or idea for what to do with it. I spent some time surfing the internet and I was able to come up with a plan.

The panel has a nautical theme, and I found that there is a traditional quilt block called "Storm at Sea." I am going to place three Storm at Sea blocks underneath the panel and then put coordinating sashing around the panel and between and around the blocks. My inspiration came from this wall hanging I found on Pinterest. I knew right away it would be perfect. I don't know who made it.

Fortunately, Susan M agreed to meet me at the fabric store to help me pick out fabric. Actually, she insisted on being there. I'm glad she came because it was so helpful to have her input. She has such a good eye for color. She also helped me figure out how to make the panel and the blocks plus sashing fit together. You will see what we came up with in a future post.

Here are the fabrics I came home with
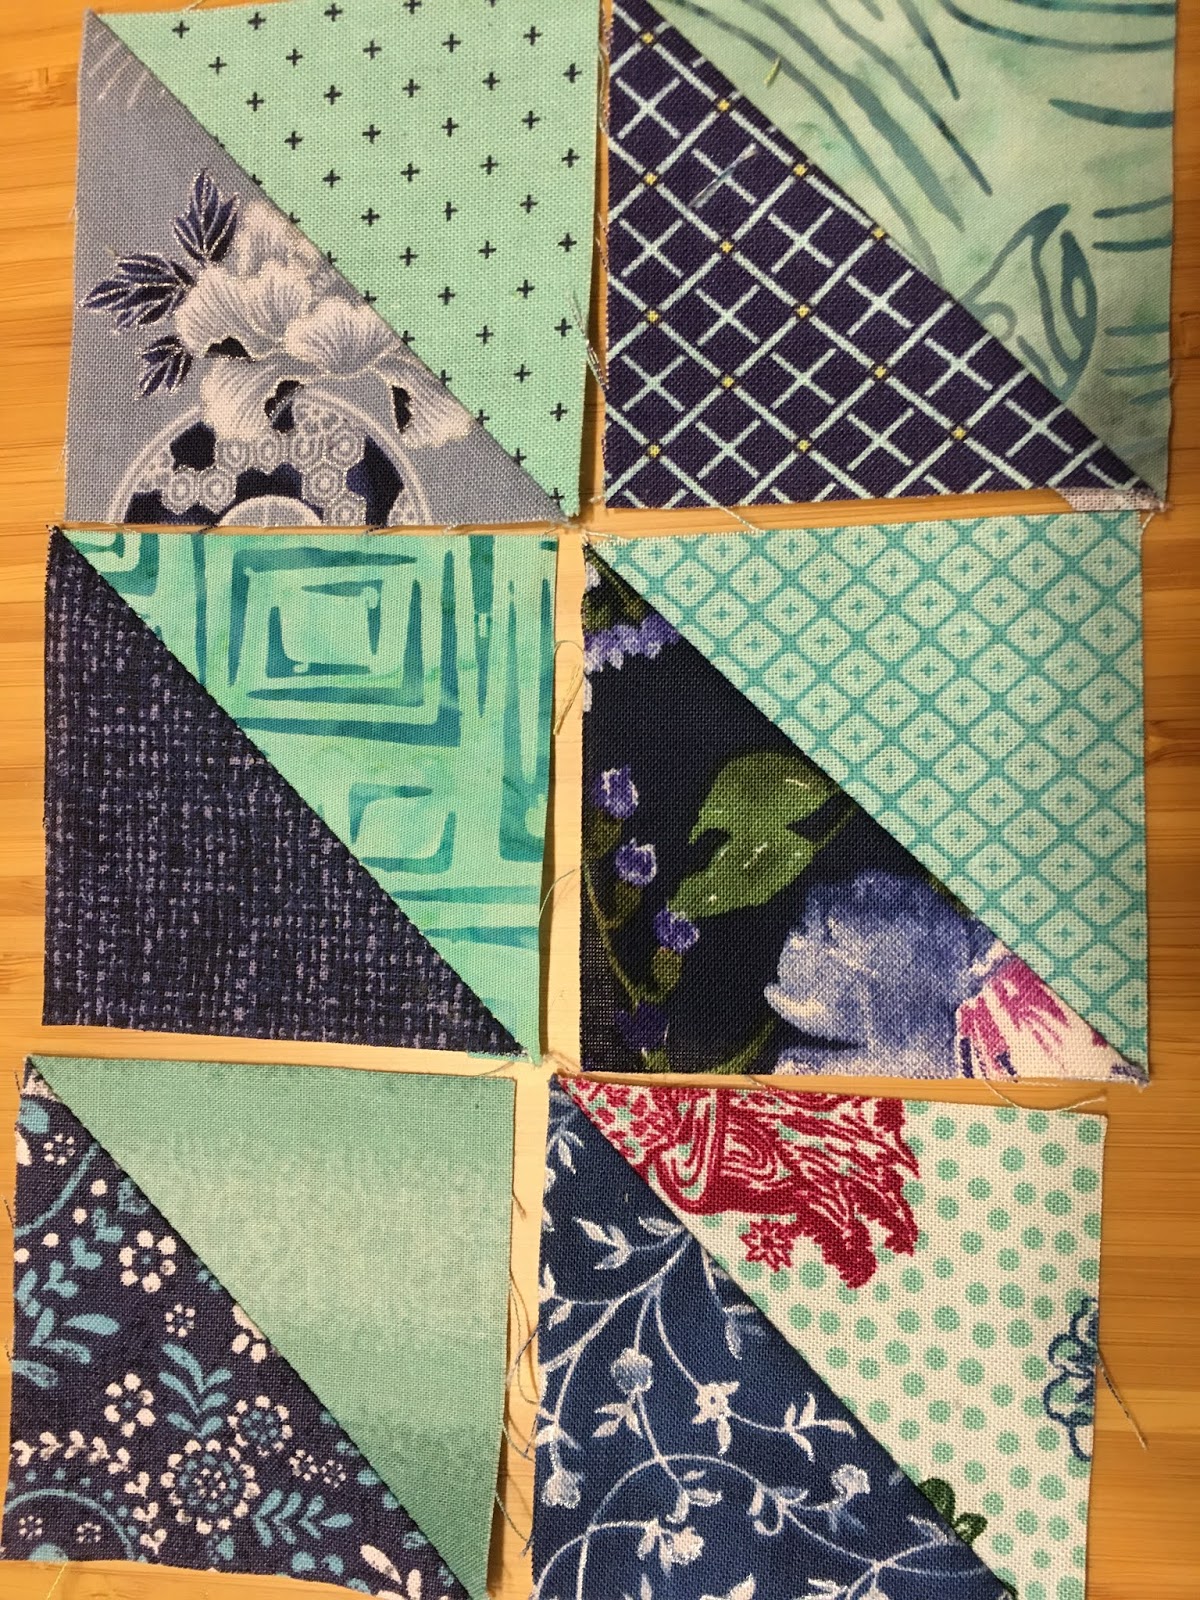
I made an inner border around the mystery panel, and then I started sewing the sashing pieces. They are actually rather difficult to cut and to sew.
Some of the sashing pieces in bad lighting. 
As I write this blog I am taking a good look at the sashing photo and the realization is dawning on me that I have probably pressed the sashing the wrong way. I don't think I can simply press them the other way because some of the seams overlap. I will have to see how it looks next to the batting. 

This is what happens when you are talking to your friends while sewing and working without a pattern or directions. :(

It wasn't all bad.

Susan M fixed a jacket. She shortened the sleeves and embellished it with molas!
 

Marilyn started a purse. She had some gorgeous Laurel Burch fabric.

Rebecca made a couple of blankets.

Sophia made progress on an adorable Elizabeth Hartmann quilt.

Susan DL experimented with knitting a kippah. Not a smashing success, but wouldn't it make a smashing tea cozy?


Now that I have started my project, I hope there will be enough momentum to keep me going without my support group.


Wednesday, January 9, 2019

A Revealing Feeling - Good Fortune, Parts 7 and 8


Bonnie Hunter revealed the full design of the Good Fortune Quilt this week after surprising us with Clue 7 a few days earlier. It's stunning. It's wonderful. I feel so fortunate to be a part of this quilt-along.

But, I now have a lot of work to do. I have to finish Clues 1-7. Then I can start on the two blocks and four borders described in The Reveal. Bonnie's finished quilt looks amazing. I am really motivated to press ahead and finish mine, but it will have to wait until I get back from my next trip.

I did a tiny fraction of Clue 7. This involved making lots of double pieces by sewing two pieces from Clue 2 together. In addition, we have to make a small number of quad pieces made with pieces from Clue 2. Here are some of the quad pieces:
Clue 7 also called for making some quad pieces with pieces from Clue 1.

Clue 7 went a little faster because there was no cutting involved, but I did make another trip to a fabric store this week, and that took up some time.

Now, before I go on, I want to talk about a New Thing. During this quilt I started listening to podcasts. That's a New Thing for me. I'm really enjoying it. My daughter recommended Serial, so I started with that. Then I added Lexicon Valley, because I love words and linguistics. Then I found a few more interesting ones. Then I got the idea that there might be podcasts about quilting, and I found several! These are some that looked interesting:
  •  Quilting . . . . for the rest of us
  •  Sit & Sew Radio
  •  The Off-Kilter Quilt
  •  Just Wanna Quilt
These quilting podcasts are not professionally produced (I assume) but they are something fun to listen to while I am quilting. Do you have any favorite podcasts?

OK, back to the Good Fortune Quilt. I didn't have a lot of time to work on it this week. I couldn't do much without finishing some of the previous clues, so the first thing I did was to finish Clue 1 completely. Then I decided to make one sample each of the two blocks shown in the Reveal. 
 
Here they are:
The Spinning Star Block


The String Chain Block


These blocks alternate in the finished quilt in a checkerboard pattern and the result is wonderful. I like the Spinning Star Block a lot. I'm not so sure about the String Chain Block. I don't think the red and orange work well together. There is not enough contrast for me. However, I think (hope) that when it is all put together and viewed from a few feet away it will look fine.

Please take a look at Bonnie's Link-Up page and check out some of the finished blocks (and even finished quilt-tops!!) that other people have done. It is so much fun to look at them.

Lessons Learned:
  • If you can't sew with friends, sew with podcasts.
  • Procrastination has its rewards. I only had to make 192 pieces for Clue 1, not the 240 originally specified.
  • Doing sample blocks to start is probably a good idea. The blocks are supposed to be the same size. It turns out my String Chain Block is almost 1/4" larger than the Spinning Star, which is the correct size. I need to think about this before I do any more work with the String Chain Blocks or the components thereof.
  • There is treasure at the end of the rainbow! Just be patient and follow it.