Sunday, November 1, 2015

Circle of Friends - October 2015 BOM

Circle of Friends is a great name for a quilt block. I like this block a lot. I like the colors (but I was a little surprised to see a NEW color, magenta, in month 10). I love the bright star in the center. I love the way the outer stars interlock, like a circle of friends holding hands.

This BOM was a little bit harder than some. I had trouble with the outer strips. When you cut the rhombus, you start out with a rectangle, and then you cut the corner off. It's hard to get it just right when you cut and when you sew the triangles onto the missing corners. The result is a new rectangle, but when you sew the rectangles together, they don't always align well. I re-did some of these pieces 3 times. Rip, rip, rip.

The second problem I had was with the directional print. I thought I had addressed making sure the print squares were all facing the same direction before I sewed the pieces together. It turns out that there are two ways to make the four-patch, and the direction of the print matters. Because the block instructions are planned so that seams alternate nicely, I didn't want to mess with things, so . . . rip, rip, rip.

The third problem was a tension problem. I had been using the machine to repair some t-shirts, and somehow the tension was a little different when I went back to quilting. I didn't figure this out right away. When I noticed the white stitches peeking through, I was not in the proper frame of mind to undo and redo a lot of work.


I am, however, very pleased with how the corners and points turned out.

Lessons learned:
  • Don't just think about the layout. Do an actual layout beforehand, following the instructions.
  • When you cut off a corner to make a rhombus, try stacking.
  • If you use the machine for something else, test the tension before resuming quilting.

Friday, October 16, 2015

Mother's Favorite - September 2015 BOM

Here we go with the September block.

I like the nesting triangles. What I don't like is the background fabric. It is off-white, but it has a very faint watercolor pattern to it. The contrast color is a light orangey-brown. It's hard to see in the photo above, but it shows up more clearly on the fabric. On some of the pieces it is much more noticeable than on others.
To me, it looks like the fabric was scorched during ironing. The scale of the print is such that you can't see the contrast color on every piece. I also think that the scale is larger than the scale of the blue and pink fabrics. It is obvious that the blue and pink fabrics are watercolor batiks. It is not obvious with the background fabric.

I suspect it might look too busy if you used a "more obvious" watercolor print for your background. Maybe the answer is to use a solid, which is what it looks like anyway.

Lessons learned:


  • Before photographing a block, remove stray threads. Otherwise you will have to choose between 1) repeating the process: taking the card out of the camera, putting it into the computer, importing the new photo, editing the photo, struggling with the photo app (the biggie), uploading it to the blog app, etc., or 2) letting people think you are lazy.
  • When selecting fabric, ask yourself what it will look like when it has been cut into small pieces. Is the scale wrong? Will there be pieces without any pattern on them? Will it look stained, or appear to have been scorched?

Wednesday, October 14, 2015

Knitters and Natters

It's hard to quilt at home. You need a lot of space, a lot of equipment, and a lot of free time.

It's really hard to quilt on a cruise. There actually are "quilting cruises," but . . . no, I don't think so.

So I cast around for a portable project. (A knitting pun and a sailing pun!) Cross-stitch fits the bill exactly.

On cruises, whenever there is a day at sea there is usually an "event" called Knitters and Natters. It's not really an event. It's more like a flash mob - just show up with your project at a specific place and time. There is no instructor, no leader, nothing. Just show up.

Usually there will be from 10 to 25 women. Never any men. So far. Most of the women are knitters and most of them seem to be making socks. There are usually a few cross-stitchers and needle-pointers. Sometimes there will be someone hand-sewing some small patchwork piece. Every once in a while you will see someone doing something like tatting or some arcane form of embroidery.

Inevitably someone will ask, "What is a natter, anyway?" Some people think it is a special kind of knitting or needlework. But the definition of natter is:


to talk casually, especially about unimportant matters; chatter

There's a little bit of a value judgment in that definition, but quite often the topics ARE relatively unimportant. That's what makes it so pleasant - no politics, no religion, no competitiveness over needle skills.

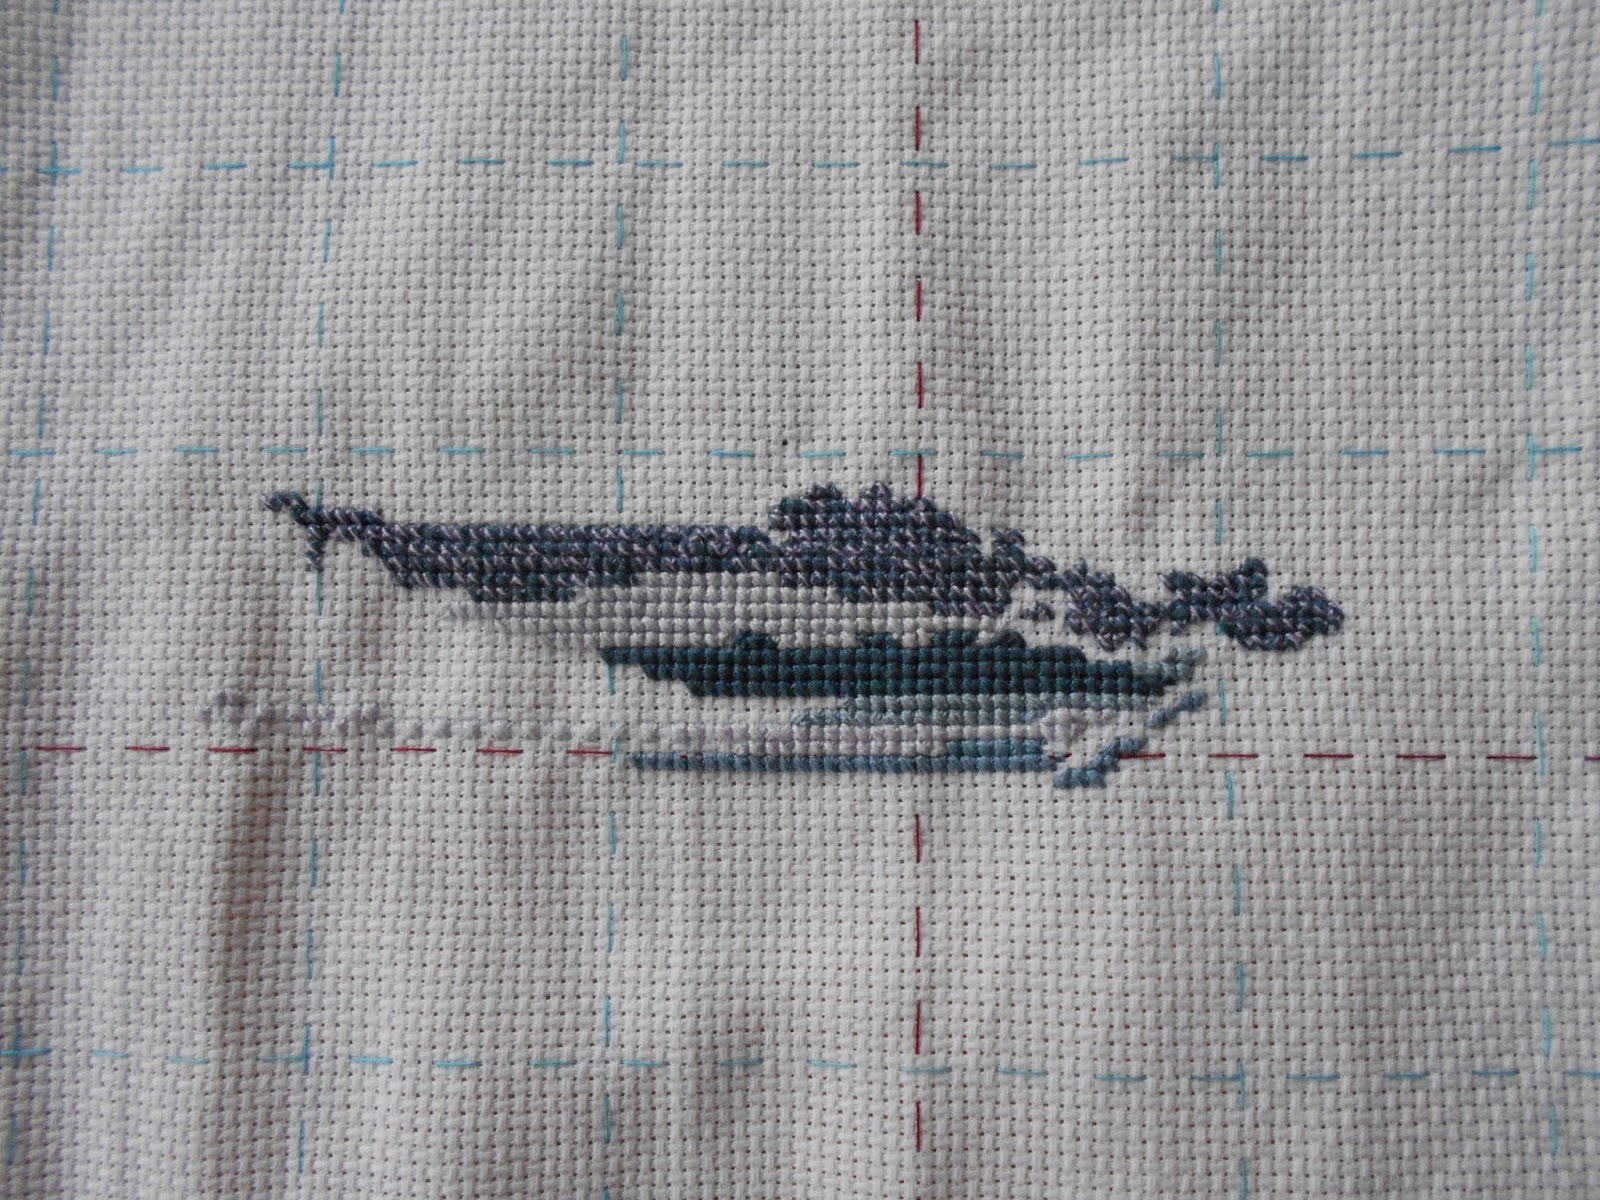
Before the trip I gathered up all of my supplies and different colors of floss. I sewed some grid lines on the aida cloth. I got ready, but I didn't start stitching until the September cruise. 

I am a relative newcomer at this. I found out there's a lot more to counted cross-stitch than just making x's. For one thing, you need good eyes and really good light. I ripped out a lot of stitches and my work went very slowly.

Here is what it looks like after two cruises:


I won't say what it is, but I'll post photos from time to time.

I was fortunate to be on the same cruise as a woman who is a MASTER cross-stitcher. She was very generous about sharing her expertise with me. Of course, I thought of a lot more questions after the cruise was over.

Her work was absolutely amazing. Her stitching was so perfect that the front and the back of her work looked almost the same.

Lesson learned:

Find a mentor. You will learn things that you didn't know you didn't know.

Thursday, August 27, 2015

Knight and Day - August 2015 BOM

After taking Rayna's class on making art quilts without measuring or using rulers, it's interesting to get back to this type of project, which calls for a lot of precision and goes very slowly.
Speaking of precision, I found this one rather difficult because there are some spots where there are so many layers of fabric that it's hard to get a nice crisp point. I actually like the appearance of the block, but it's not an easy block to do, and maybe it shouldn't be done at all. There are so many other possible blocks that won't present this type of challenge.

Despite my best efforts, and my seam ripper's best efforts, there was a palpable lump wherever two points came together. In some cases the lump itself made it hard to match up the points because the fabric wouldn't lie flat at the site of the lump.
Examples of problem areas
Maybe it would be better to avoid patterns with a design that has too many layers of fabric in one spot. Or maybe I need to pin and sew more carefully?

I did get to try out a partial seam technique on the center star of this block. It really wasn't that hard.

My final comment has to do with the colors. I would have tried to put some of that beautiful yellow fabric into this block. I'll have to wait and see what it looks like when all 12 blocks are done.

Lesson learned: 
Avoid blocks that are technically difficult if little imperfections bother you.

Monday, August 24, 2015

What if . . . ?

Day 3 of the workshop. I'm tired, but excited to find out what is in store today.

Today's theme was Jump-Starting Your Art Quilt. First we talked about how different emotions translate into colors or shapes. Then we had about 10 minutes to sew something that reflected an emotion. Most people chose happiness.

I wasn't pleased with the one I did. My sewing machine started acting up as soon as I started sewing. It wouldn't stop sewing when it was supposed to. Perhaps some of my frustration was reflected in my "happy" piece.
The next sewing exercise involved mind mapping. We had to free-associate words and then make something reflecting the last word. Don't ask me to explain my progression of words, but I started out with "pants" and after about twenty words I had something that had no relationship to "pants."
Can you tell what this is? The answer is at the end of this post.
We had a limited time for this, so I didn't bother to change out my foot to allow free-motion stitching. In other words, I could make better spirals than this if I wanted to. ;) I do like this one, and it taught me that I can quickly come up with something if forced to. 

I can't say I like the idea of deciding to make a quilt when you don't have an idea for it. Maybe if you had some really great fabric and you didn't know how to use it, this would be a good way to go. It makes more sense to me to have an idea first and then decide to make a quilt based on your idea. But that's why I'm taking this class - to learn new approaches to creativity, to move outside of my comfort zone. If you know me, you know that I am excellent at following directions, but not proficient at working without directions.

Next, we had time to finish the project started late yesterday. The prompt was to make something with  three colors. It didn't have to be two neutrals and a color - just any three colors. I like this type of prompt. It is enough of a guideline to make me feel like I am following directions, but enough of an open-ended assignment to make me feel like I am stretching myself to be creative.

I'm still not sure about putting emotions and feelings into a quilt, but I wanted to do more with "design" than stripes. I decided to work on scale. I had some 5" squares that I bought in Hawaii - at Hilo Hattie's, as a matter of fact. (Hattie's was nicer than I expected it to be. Yes, a tourist trap, but they had a lot of things you would actually want, including some gorgeous Hawaiian quilts.) I hadn't been able to figure out what to do with the squares, so I decided now was the time. I took my three colors from one of the Hawaiian squares.

Here it is on my design wall
It turns out that it is quite tricky to sew a lot of shapes together when they are different sizes. I didn't get to finish this project, but I got a few of the pieces sewn together and I have an idea how I am going to do the rest. I will add a blog post when it is finished.

One of the class members works with sun prints and she brought some treated fabrics so that we could all try it out. I had forgotten to find something interesting at home last night, so I decided to use a phone cord, thinking I would get some nice swirly shapes. (It didn't work so well because the cord would not lie flat. I didn't want to tape it down or put a rock on it, because that would become part of the print.) I think if I cut it up, I will have some interesting pieces of fabric. 
Sun print of my phone cord
Some of the prints made by others were much better and more imaginative. Here is a piece Nan made using sun prints of a rotary cutter blade, a pair of scissors, and shibori, which is similar to tie-dye.


I loved many of the projects made by others in the class. It was so interesting to see what they came up with. I took a few photos, but did not have a chance to obtain permission to post them on my blog. (There's a lesson on time management there.)

Lesson learned:

I think the most important lesson I learned from Rayna is to say "What if . . . ?"

What if you moved that piece over here?
What if you added more blue?
What if you made a place for your eye to rest?
What if . . . ?

You can say "What if . . . ?" to other people in all sorts of situations. You can even say it to yourself. It goes way beyond quilting. It doesn't sound like you are being criticized or corrected or told what to do. It sounds like the speaker is thinking out loud with you and inviting you to join in. I love it! Rayna said it a LOT during this workshop.
Nan and Rayna
All good things must come to an end. What if I finish the three pieces from this weekend? What if I make another art quilt, without a safety net? What if I stop telling myself I'm not creative? Thank you, Nan and Rayna!


Answer: I ended the mind map with the words "cocoa," and then "steam." My piece is probably too literal, but at least I came up with something in a very limited time, and at least I left out the mug because I realized that would make it more of a picture and less of an idea.

Sunday, August 23, 2015

Kiwi, Anyone?

Today was Day 2 of the workshop with Rayna Gillman. We were challenged to make something using a limited color palette: 2 neutrals and one color. This was intended to allow us to focus on design without being distracted by colors.

I have to confess that I am not sure what "design" is, or what makes a design "good." I guess the idea is to play around with it until you like it, then get some feedback from others and then play around with it some more.

I decided to use grey, white and green. I started out with strips, the same as yesterday, because I was not yet in touch with my inner designer.
On the design wall
I added a kiwi green focal point to one of the strips and sewed everything together. For no particular  reason, I flipped the piece around, in case you were wondering.
Here is my focal point. Ta da!
When it was my turn to get feedback I was encouraged to add a few more partial strips to complement the focal point. I did so (and I broke one of the rules by adding strips made of a print containing blue and purple).
I'm not sure whether I like it better with or without these additional focal points
I used fusible web to add the strips because I had already sewn everything and it seemed like too much work to rip out stitches and cut and sew partial strips together and then re-sew. It felt like cheating, but I reminded myself there are no rules.

Although I didn't feel that I was focusing overmuch on color for this one, I also didn't feel that I had much of a focus on design. If design is what order the strips are in and how wide they are, I did focus on that. If design is making different shapes and patterns, I didn't really do that. I stayed with what I knew from yesterday.

I like what I ended up with. It feels "artsy" to me. I plan to finish it and hang it up somewhere. Maybe.
After two days, I really feel that I have moved up to the next level of quilting. I have created two projects without using a pattern or instructions. This is SO not me. This is SO far outside my comfort zone. Rayna is so encouraging.

Saturday, August 22, 2015

Reinventing the Secret Garden

In 2014 I did a BOM called The Secret Garden. I started blogging about it in 2015, and I actually haven't finished writing about the process of finishing this project. I have covered 11 of the 12 blocks. I haven't written anything - yet - about the sashing.

If you have followed my commentary on the monthly blocks you probably realize that I don't like this quilt very much. I especially didn't like it after I did the sashing. I will write about that eventually.

But I am going to skip over that part for now, and talk about Day 1 of a 3-day workshop I am attending. The instructor was Rayna Gillman, from the East Coast. The name of the workshop is Cinderella Quilts! Reinventing the UFO.  (Quilters tend to have a lot of UFO's - UnFinished Objects.) As soon as I heard about this workshop, I knew I wanted to learn how to take unfinished projects and ugly projects and turn them into gorgeous, finished pieces of art. Rayna's work is beautiful, and I would like to try to tap into my artistic side (if I have one) and see what I can come up with. As Rayna says, if you don't like it, it can't get any worse, so don't be afraid to cut it up and experiment.


Rayna shows us how she made some of her "What-was-I-thinking?" blocks into fabulous pieces
I started with three blocks from the nearly-finished Secret Garden
The first step is to fearlessly grab your rotary cutter (by the handle, please) and slice up the sacrificial blocks. There are no rules, no measuring, no using a straight edge. Just start cutting.

This wasn't a photography class, and so I did not learn how to take photos with accurate color values. What you see below is not very true to the actual colors, but you can get the idea.
The first few pieces go up on my very first "design wall."


More pieces
Starting to sew the pieces together


There are 4 strips from Secret Garden lurking in here
After sewing all of the pieces together I squared it up a little and thought about what else it needed.


I decided to cut it into thirds. After the shock of cutting up a block I had spent time on and effectively ruining the whole Secret Garden quilt, it was not as awful to cut up the piece I just made. I  tried flipping one of the pieces but I didn't like the way that looked, so I kept them with the same orientation but shuffled the order. I think that added a LOT of interest and movement to it.

That's as far as I got. It was a long day. Tomorrow I will decide how it should be finished how I want to finish it. No rules, remember?

And I will start on a companion piece.

Rayna has all kinds of helpful tricks. I'm not going to give them all away. You'll have to take her class or buy her book. Link to Rayna's Book
So many opportunities to recycle