Friday, January 31, 2020

Playmates

Part 8
This clue has good news and bad news.

The bad news is: More Flying Geese. They will be raspberry, blue, and aqua (RBA, for short).

The good news is: No cutting! We are going to use pieces - but not all of them - from Part 4 (aqua QSTs) and Part 7 (raspberry and blue HSTs) to make RBA Flying Geese.

After sewing the RBA Flying Geese, I combined sets from earlier Parts to make two kinds of mega-sets. 
  • Type A has the green Flying Geese from Part 6, and the RBA Flying Geese I just made in Part 8, and the Pinwheels from Part 7, and the HSTs from Part 4. 
  • Type B consists of the green Flying Geese from Part 6, and unsewn RBA pieces from Part 4 and Part 7 that match the pieces I used to make RBA Flying Geese, and HSTs from Part 7 (i.e., the unsewn Pinwheel HSTs) and HSTs from Part 4.

It sounds very complicated. It was so complicated I forgot to take photos. But, it really wasn't as hard as it could have been, because the raspberry, blue, and aqua pieces within each mega-set matched! 

All of these pieces played so nicely together! And it's not too late to take photos now. Here are two of my Type A sets:


Monday, January 27, 2020

Play It Again, Ma'am

Part 7

For Part 7 I had to cut a lot of blue and raspberry Half Square Triangles. Then I had to sew half ot them together into squares, just like I did for Part 3 and Part 4 and Part 5. 

Oooohkaaaay. I can do that. But first I have to go to the fabric store and buy more raspberry fabric. I didn't get enough initially. And I didn't get enough different raspberry fabrics. I think this quilt will look better with more variety. That's one reason I don't make all of the pieces in a part (or clue) the first time through. If I end up getting more fabric later, I want to be able to distribute it evenly throughout the different parts. If I just plowed ahead and sewed all of the parts in each clue, I might run out of raspberry in Part 5 and the find out the shop where I bought it is now out, and I would get something different and then clue 7 would have only the new raspberry, and clues 1, 2, and 5 would not have any of the new raspberry, and it might not look good. It's possible it would still look good, but I don't want to take any chances.

The reasons I don't buy all the fabric in the first place so I can avoid running out are:

1) I am always hoping I will find another fabric that I love before I am too far along
2) The instructions don't usually specify how much is needed for each color

I might run out anyway because I made a mistake and wasted some fabric, or because the instructions were wrong, or  . . . . It happens.

These are some of the things that makes a mystery quilt interesting.

So, I was talking about making squares. After I made lots of squares, I had to take some of the squares and make them into pinwheels. 😾 I really don't like pinwheels. They are so hard. I can never get the points to meet in the center. There is always so much bulk in the center. Ugh.

I followed Bonnie Hunter's directions very carefully. I measured whenever she said to. Bonnie says to keep the line on the ruler up on the fabric, and I did. Bonnie says to allow for the fold in your measurement, and I did. Bonnie says to trim slivers using the Simple Folded Corners Ruler after you sew the squares, and I did.

And you know what? It worked. I am VERY pleased with how nicely my pinwheels turned out. They are flat, and the correct size, and the points meet in the center. Whooppeee! These are my best pinwheels ever.

Sunday, January 19, 2020

Double Play

Part 5
All I had to do was some half-square triangles. They are almost the same as the HSTs from Part 3. Easy peasy!

Part 6
Flying Geese. 😩 They are so much work. I always end up having to redo a lot of them. It's hard to keep the three parts aligned in a straight line.

The green fabric is finally making its debut now. It is going to be a "constant" fabric, so there is only one green fabric. I was beginning to wonder when we would use it. The green fabric will be cut into HSTs and combined with the blue QSTs from Part 4.

The blue QSTs are already in sets.That makes it easy to make the Flying Geese in sets.  Each finished set of Flying Geese has to be placed back into the group of pieces those blue QSTs came from. 

Once again, I made good use of the Essential Triangle Tool to cut my wing triangles from green strips. 
 
I had fewer redos[1] than I have had in the past. Maybe I am finally getting the hang of this.


[1] The Blogger editor doesn’t like redos. I looked it up and the internet thinks redos is the proper plural of redo, although redo's is also acceptable. Note, however, that when redo is a verb, redoes may be appropriate in the case of third-person usage. Note, also, that redo should not have a hyphen.


Even though I didn't have many redos, these pieces took forever. To make things worse, Bonnie slipped Part 6 in as a second part in a single week, so I also had half the expected amount of time to complete this part. I now understand that I am not going to catch up to the live mystery. Oh, well.

Wednesday, January 15, 2020

Play by Play

Part 3

Part 3 of the Frolic! quilt calls for half-square triangles with a neutral fabric for one half and either dark blue or light blue for the other half. I used Bonnie Hunter's Essential Triangle Tool to cut the pieces from short (for greater variety) fabric strips. There are other methods for cutting half-square triangles, but I really like this method because it seems to minimize waste. It's also fast, because you can cut both halves of the square at the same time.
Some of my half-square triangles

Part 4

In Part 4 I finally got to use some of my aqua fabric. I found a really fun print that I am going to use as an aqua. I almost could have used it as a neutral. It has accents of raspberry, dark blue, and sage green (coming up eventually), and the pictures are soooo charming. (OK, so I realize they won't be that charming after I cut the fabric into a lot of little triangles, but I will know what was there.)

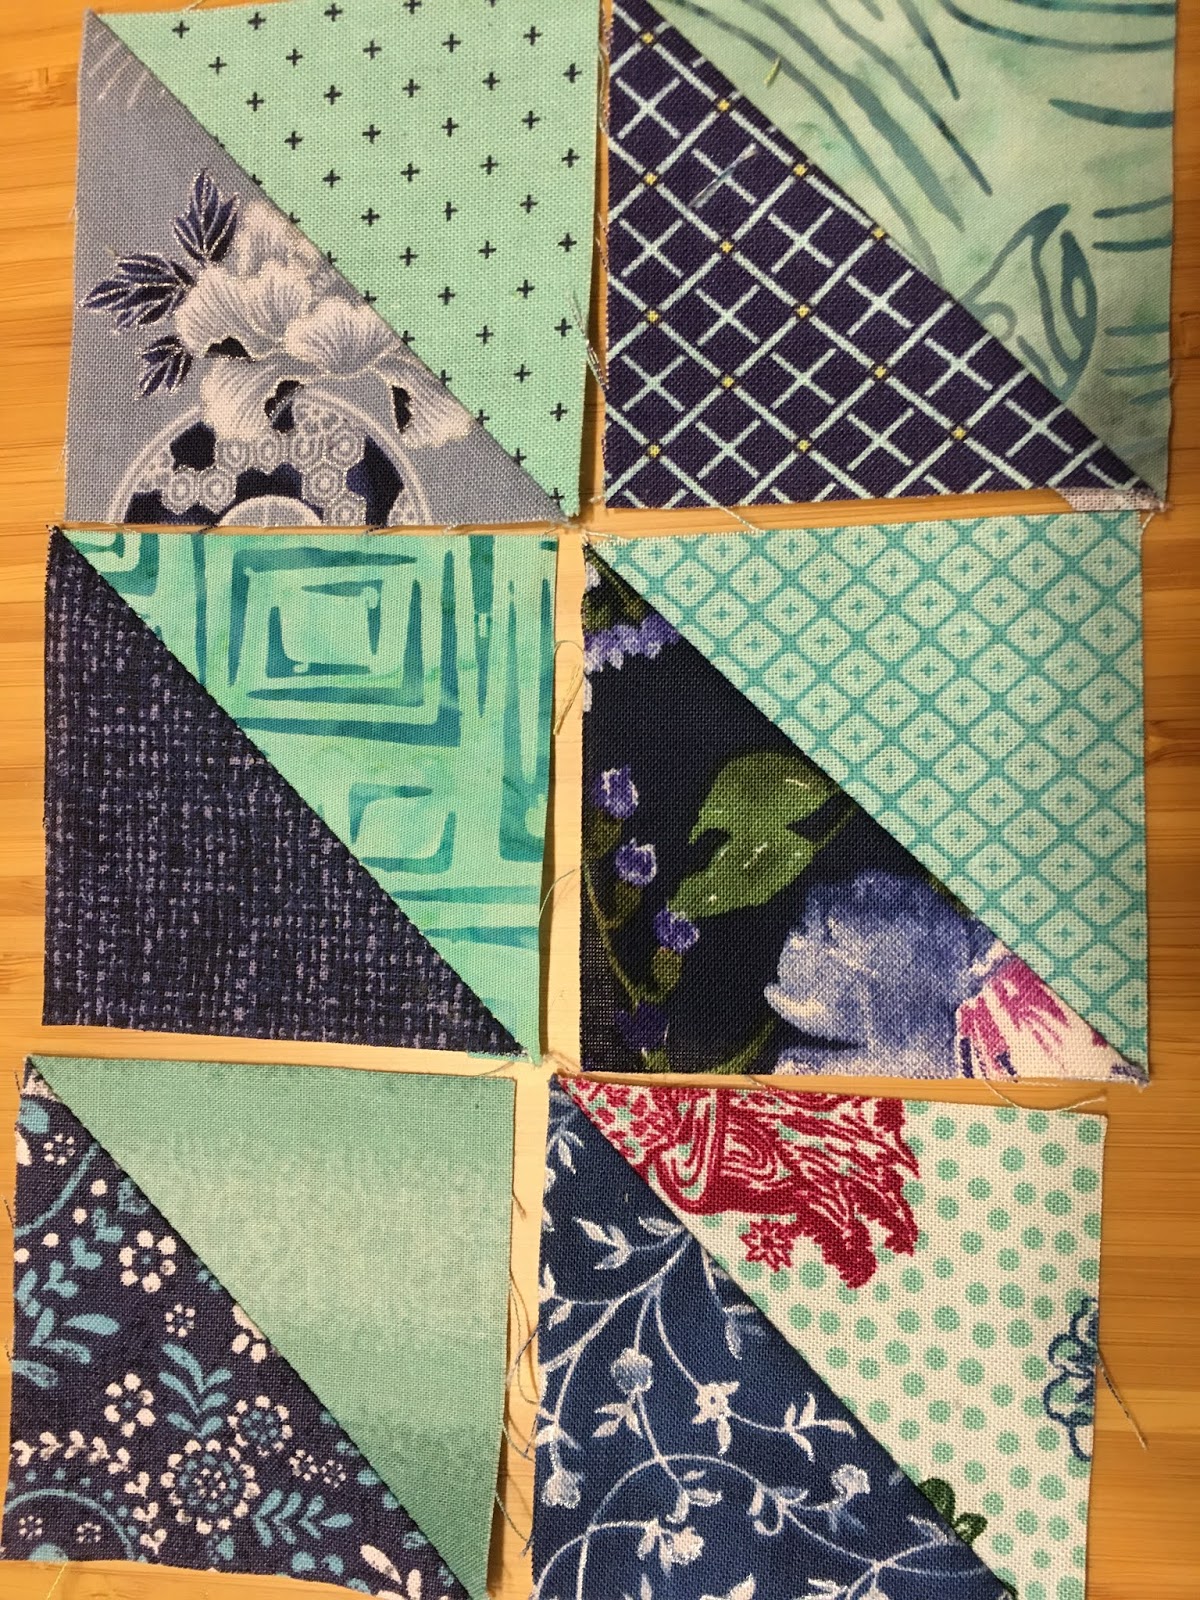
Part 4 was very complicated. I had to make a number of sets of blue and aqua. Each set has 4 half-square triangles, which I had to cut out and sew, and 4 blue quarter square triangles plus 4 aqua quarter square triangles, which I did not have to sew (yet). Each set can (and, for a scrappy look, should) be different, but the blue and aqua fabrics within a set have to be the same for all the pieces in the set.

I can't show you a picture of a complete set because I used certain elements of each set in a later part. Here are some of my completed HSTs. Each one is from a different set.


There is a way to cut out both the HSTs and QSTs from a single strip (if you are careful!) using the Essential Triangle Tool. I had to make some adjustments, but I was able to do it.
The Essential Triangle Tool

One aspect that was especially tricky was getting sufficient contrast between the aqua and the light blue. I like contrast a lot, and I wanted to have as much contrast as possible, so I tried to avoid certain combinations of aqua and light blue. I am probably going to end up with about 70 to 75% of my sets being made with dark blue, but I think I will like that. Here is a pairing that I made where I didn't love the contrast.

Here is a trick for studying contrast. Change your photo to black and white and see what the contrast looks like.


It's actually not as bad as I thought. 

But look at the contrast between aqua and dark blue. It is much stronger for the five dark blue HSTs than for the light blue one in the upper left corner.


I am going to trust Bonnie Hunter and keep some light blue in the quilt. What do you think?

Saturday, January 11, 2020

Playing Catch Up

I thought if I worked hard, I could get caught up to the group quilting-along with Bonnie Hunter on the Frolic! mystery quilt. I decided to try to finish between 25% and 50% of the pieces in each clue.


The clue for Part 1 called for making four-patches using raspberry, light blue, and dark blue. Here are a few of mine. The lighting was bad and the colors do not appear accurate in the photo. But you get the idea.


I followed Bonnie Hunter's "nesting method" to make these four-patches. It speeds things up, but what I really liked about it was how nicely the center seams aligned.

Part 2 was pretty easy. I made these pieces with raspberry and neutral. I have quite a lot of different neutrals. I even tried using a neutral that was a plain solid.
Part 2 pieces

The colors are much more accurate here. 

I started out over 5 weeks behind. I don't seem to be catching up. :(


Tuesday, January 7, 2020

Merry Play

Wow, it's been a while since I posted about quilting. I've been traveling more and sewing less. Now I have a little time to sew and I have a new project I am working on. I know. You are wanting to see a picture of the finished Good Fortune quilt, or the surprise piece I am making for my friend. Well, unfortunately, I haven't made much progress on those projects.

Meanwhile, while we were away on our last trip, Bonnie Hunter started a new Mystery Quilt-Along. This one is called Frolic!. As soon as we got home I tried to dive into it. It took me a while to get the fabric. We are down to three local quilt shops plus Jo-Ann's. One of them is downtown and caters mainly to tourists with primarily Alaskan-themed fabric that I don't often use. The second shop, Seams Like Home, has a buyer whose tastes are the polar opposite of mine. Lately I haven't been able to find much there. That leaves one good quilt shop, The Quilt Tree, plus Jo-Ann's. (I recently heard a rumor that Jo-Ann's is going to move into a smaller location and the two local outlets are going to consolidate. Can this be?)

Now that I think about it, there are actually two quilt shops in Eagle River. I have never been to them and I don't like driving out there in the winter, but I must remember to check them out soon.

So, I wanted to start Bonnie Hunter's new mystery quilt-along because I love the colors she used. After about 5 trips to three of the four local fabric stores, I had enough fabric to start. Here is a good part of it:
My Dark Blues
My Raspberries

My Light Blues

In case you're wondering, one of the definitions of frolic is "merry play." What a perfect description of how I feel when I'm quilting!

Wednesday, May 15, 2019

So Much to Wilt About

It is REALLY HARD to make a quilt without a pattern or directions. I have had so many problems. I have done a lot of work, but I am less far along than I was last time I posted.

The quilt has three kinds of pieces: Blocks, Sashing Strips, and Cornerstones. I made them all, not without difficulty, and even started sewing them together. Now I am facing the prospect of doing most of them over.

Here are the Blocks:


These are the only pieces that worked out well. I made them to finish at 6". The blue inner square finished at 3".  

I happen to have a number of sets of Marti Michell templates from Saturday Sampler classes I have taken. It turns out that Set A had all the templates I needed to make these 6 " blocks.  Yay! Set A is called The 3" Basic Square Set. The set has more than three pieces, but I only needed these three:
I put little silicone circles on them. It makes them more stable when you are using them. Otherwise, they tend to slide around on the fabric.

Here are some of my Sashing Strips:
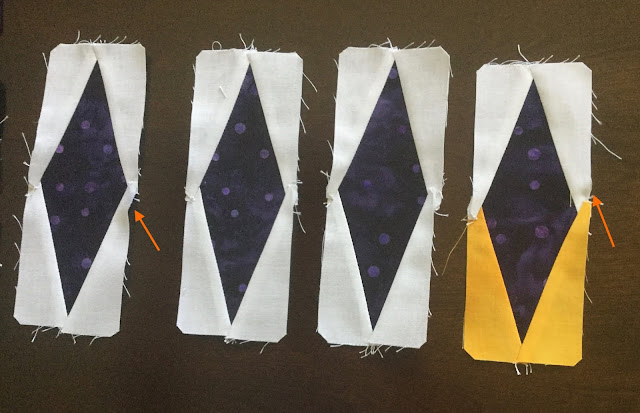
The arrows show some of the worst areas of buckling

The Sashing Strips are supposed to finish at 6" x 2". These were the hardest pieces. They were hard to cut and hard to sew. They ended up being too long, crooked, poorly aligned, buckled, cock-eyed . . .  you name it. I thought I was being careful, but these pieces call for the very highest level of attention.

I pressed the seams away from the center and then realized you could see the seams through the fabric. I thought I was going to have redo all of them. I ripped out parts of the seams on one piece, and tried to press the seams toward the center until I realized that there would be an unacceptable problem with overlapping seams near the points.

I used Marti Michell's Long Skinny Sashing Star Set. I have no idea how to make the diamonds without some sort of template, but the Long Skinny Sashing Star templates are not easy to use. For example, to make the diamonds, you have to cut one side of the diamond, then flip the template around and cut the other side. You needed to make marks in two of those tiny pin-holes using a pencil, and then align the template on the pencil marks after you have flipped it.
Note the tiny holes for marking alignment.
(I used small adhesive sandpaper circles to help stabilize the templates. Maybe I need a few more?)

I didn't realize the Sashing Strips were too long until I had made all of them. A few of them might be okay. I thought maybe I could trim the ones that are too long, but I still have many that are crooked, buckled, and/or cock-eyed. How could this turn out so badly?

Do I try to re-use the pieces? Do I simply trim the ones that are too long? I don't know how much of my problem is a cutting problem, and how much is a sewing problem, so I think I had better cut out new pieces. Thank goodness I have lots of fabric.

And then there are the Cornerstones.
The Cornerstones need to finish at 2" x 2". I had to use the Pythagorean Theorem to figure out the size of the inner square. The outer square is 2" x 2" so the outer triangles have catheti of 1". That means the hypoteneuse is 1 . . . a squared + b squared = c squared . . .
the square root of two! Aha, it's 1.414! So that is going to be finished size of the inner square.  So, add 1/4" for the seam allowance and it will be 1.664. No. I think I will need to add 1/2". Right? So it will be 1.914? How am I going to measure that? Can I round it to 2?

What about these really small templates in Set A? Wouldn't they be the right size? I think the template will give me a 2" square, not a 1.914" square. But it comes with Set A. It should work, right?

So, the first time I cut out the black triangles, I had the grain the wrong way. After I realized that, I cut out another set of black triangles, and sewed ALL the Cornerstones together. Yay! Almost done.

Then I laid everything out and started sewing rows together. After I sewed the first row together I realized it was too long. And I also realized that the Cornerstones were a little wider than the rest of the Sashing Strips. I measured and I thought and I looked at the pictures and the templates and the template instructions, and I finally was forced to accept the fact that these templates were never intended for the purpose I used them for. I didn't think 0.86 inches was a big deal, but it was. I should have known that. I did know that. I just got lazy. How do you measure such a small size anyway?

I found that we had an engineering ruler that had tenths of an inch. That helped me with my measuring. I made my own templates, a tiny bit smaller than the Set A templates. I made a few new Cornerstones and sewed them to some Sashing Strips. Much better! A whole row of pieces that are off by 0.86 turns out to be off by a really significant amount.

Now, do I rip out the seams, trim all the pieces, and re-sew, or just cut new pieces?

Sigh. I am so wilted.

Lessons Learned:
  • Measuring matters. It REALLY matters.
  • Measure before you sew ALL your pieces. Sew before you cut ALL your pieces.
  • Don't be lazy. A tiny little discrepancy isn't going to go away. It is going to multiply.
  • Always check the grain before you cut.
  • Don't assume that just because templates come in the same set you can use them all in the same project.